The Sky Replacement Tool
Photoshop has an amazing new Sky replacement tool that will blow your mind.
Sky replacements, it used to be hard work to get a result that worked. To pull it off you needed to have some pretty good compositing skills and even then the process was very time consuming.
An easier route would be to use a third party plugin. These did work but then you had to master new tools that were not in Photoshop.
Well all that has changed now in the October 2020 release of Photoshop where replacing a sky is now easy peasy.
How to replace a rubbish sky in your photo
Replacing a sky in your image with the right tools is quite simple. But getting it to look realistic can be another matter. You need to take into account other factors such as lighting direction, lighting intensity and perspective to get a credible composite. Photoshop skills are not enough, if the photos don’t have a relationship then the edit will not work.
Lets explore these relationships in more detail.
Lighting Direction
The first and most important aspect to look at is the direction and intensity of lighting. Normally we are working with landscapes so our main light source is the sun.
It’s critical that the position of the sun is the same in both the foreground and the sky images or the composite will just not work.
By examining the shadows in the images we can tell where the sun is so we can be more specific in selecting a suitable sky.
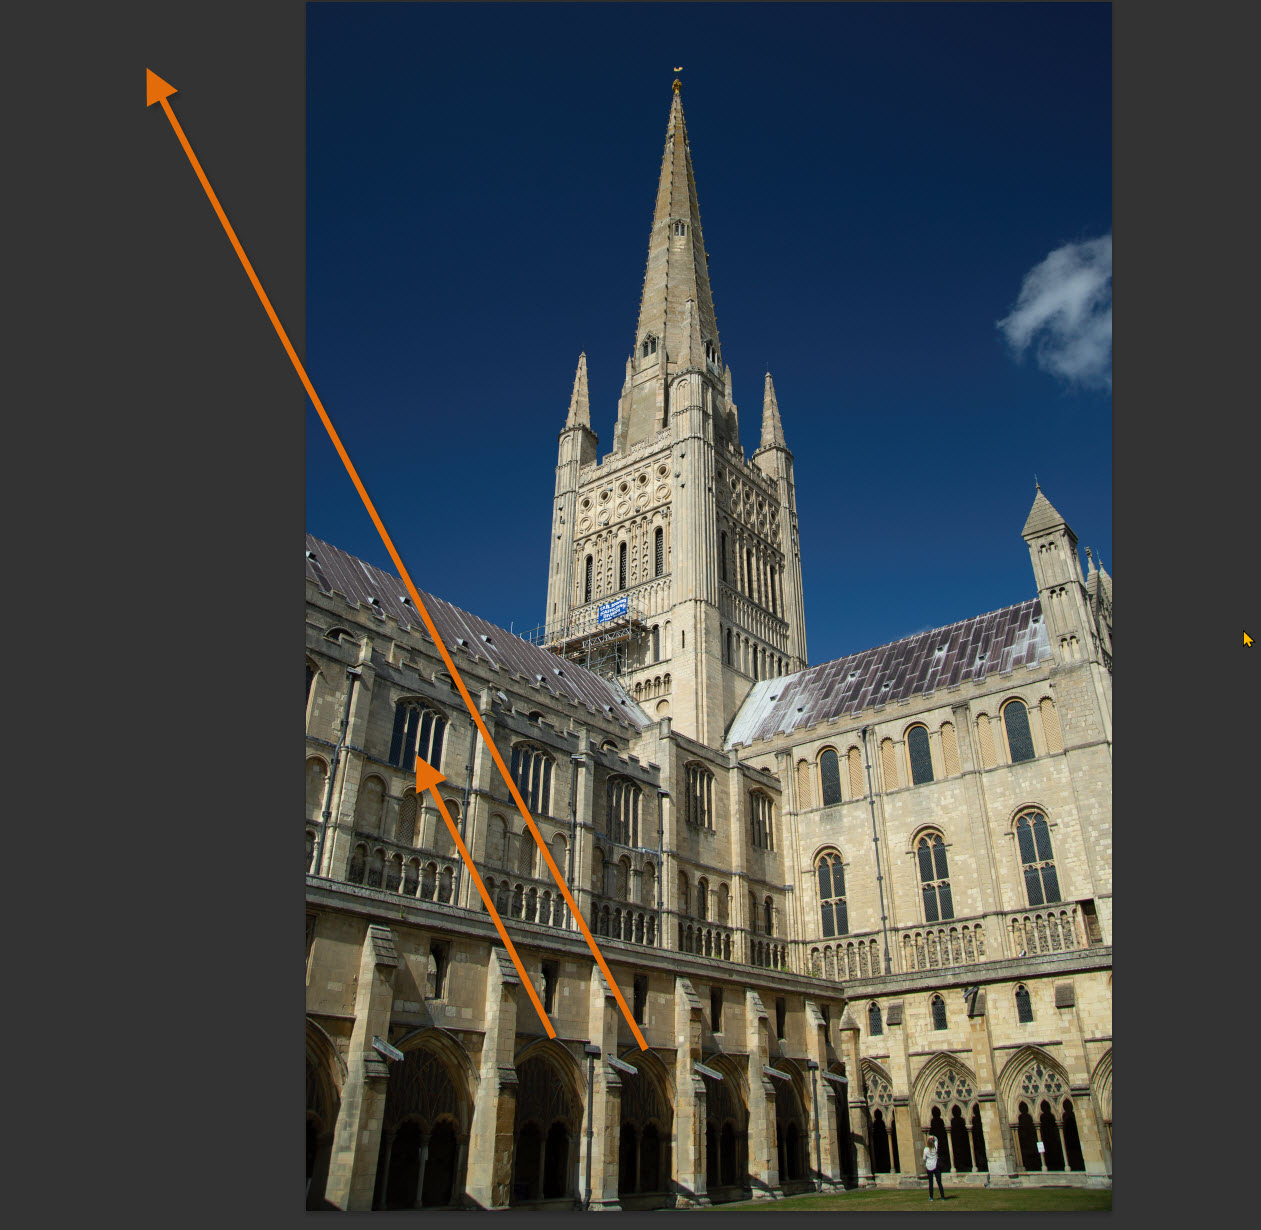
From this image we can establish that the sun is high on the left hand side. So we need to select a sky where the sun is roughly in the same position.
Lighting Intensity
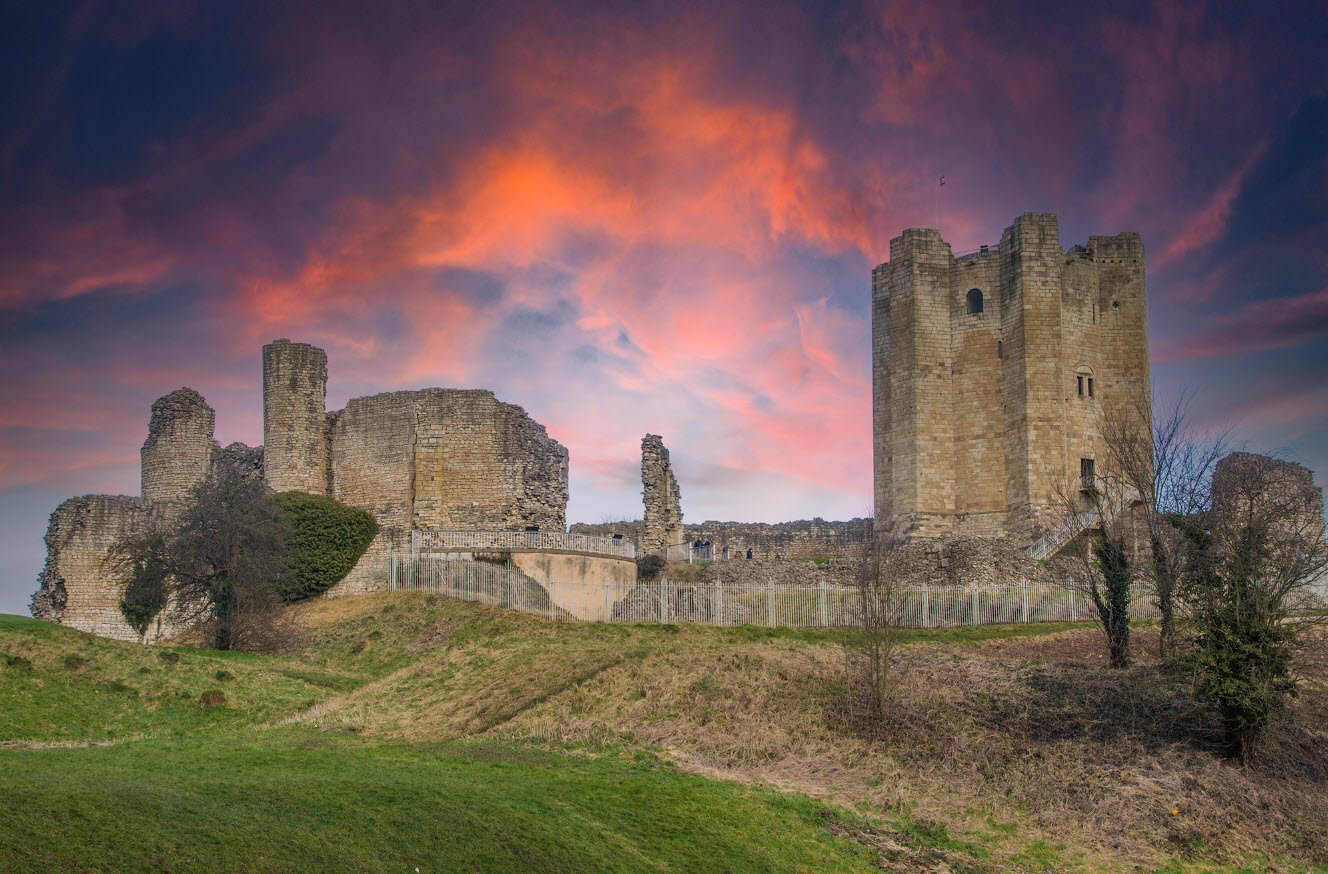
Is the light strong and directional or is it soft and diffuse. Again we need to match the sky to the light on the foreground. If the sky is dull and cloudy then replacing it with a brilliant blue sky will not work, it will look fake.
In this image the light is diffuse and soft so replacing the sky with a dramatic sunset would not work.
Perspective
If there are clouds in the sky they will exhibit perspective. The closer clouds will be bigger than clouds further away indicating that the sky has depth. A sky shot taken vertically will not have the same perspective as a landscape shot so will not match.
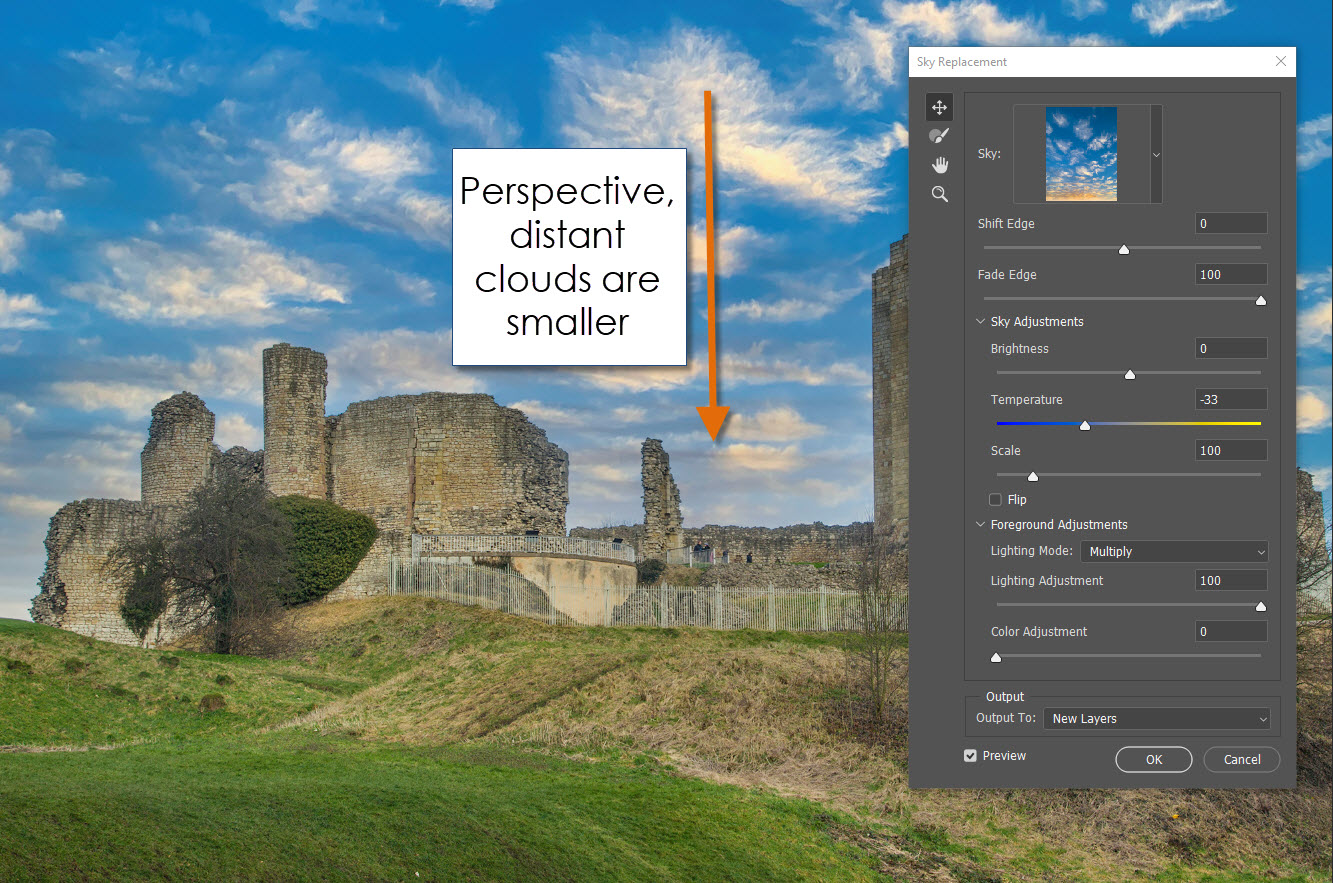
As a guide I always take shots for my sky library with a small section on of the horizon in it so they will exhibit a correct perspective.
Remember the goal is not only to replace a sky but to make it believable. No matter how good your Photoshop skills are you will not be able to combine two images that could not possibly exist in the same image.
The Sky Replacement Tool in Photoshop
Adobe continues to give us tools that automate complex tasks and give a professional finish. The Sky Replacement Tool is just another in a long line of such tools and allows us to replace a sky easily and quickly and get fantastic results.
Adobe Sensei handles all the masking and blending, and “cutting-edge algorithms” are used to “harmonize the foreground of your image with the sky” so that the lighting doesn’t clash.
First you may want to duplicate the background layer. My favourite method for this is the keyboard shortcut CTRL+J(Win) CMD+J(Mac).
Then go to the Edit Menu and select Sky Replacement.
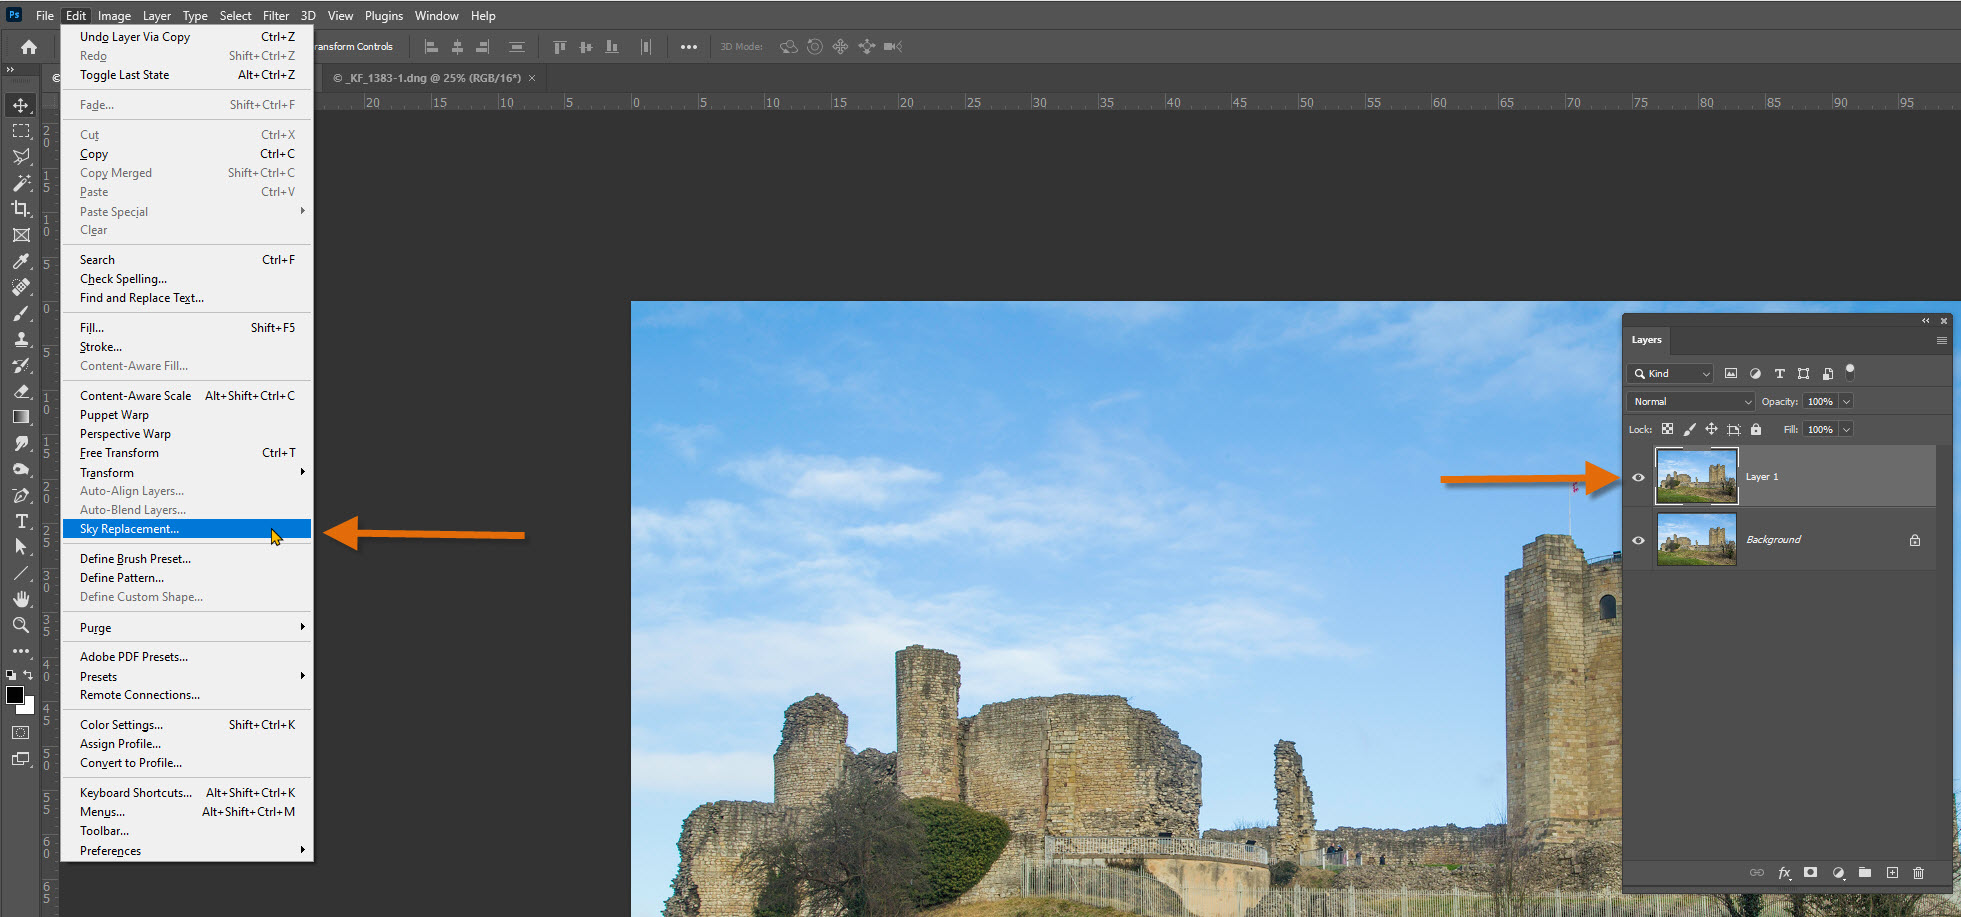
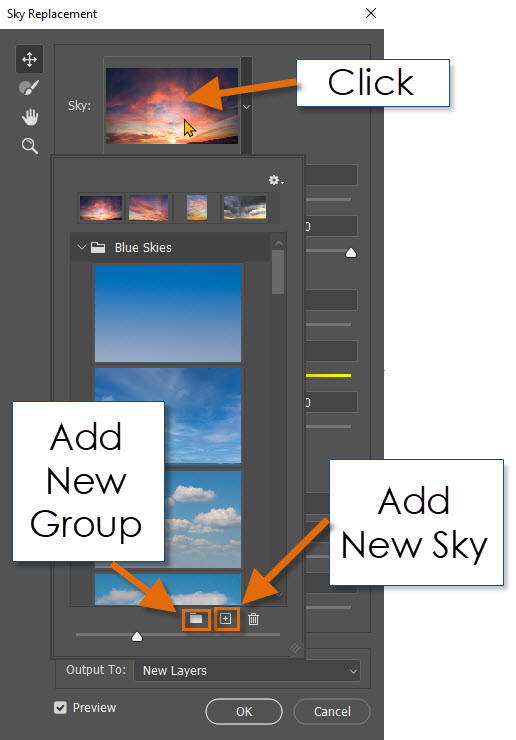
The Sky Replacement dialog will open. By clicking in the sky dialog you can choose from lots of presets that come with the tool. There are many options for dramatic, cloud filled or plain skies.
If none of them float your boat then you can add your own sky by clicking on the plus(+) icon at the bottom of the panel. To the right of this is the group Icon where you can create new groups and drag and drop your skies into them to get organized.
Just scroll through and click on a sky and Photoshop will apply it for you.
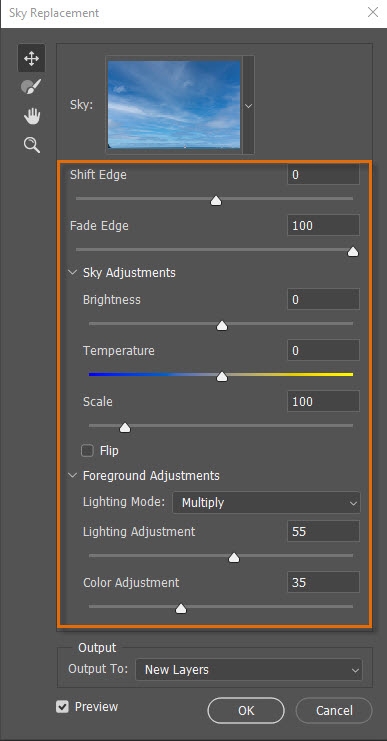
Once the new sky is in place if you think it needs a little tweak there are options to Shift or Fade the edge. If its nearly there but not quite there is a Sky Adjustments section for you to work on the brightness and temperature of the sky and foreground to match them as closely as possible making it look as though they were photographed on the same day.
Output Options
Now this is the most exciting bit. If you select Output as New Layers and click OK instead of just giving you a flattened end product Photoshop converts all our adjustments to adjustment layers and masks which you can edit further if necessary… now is that not so cool.
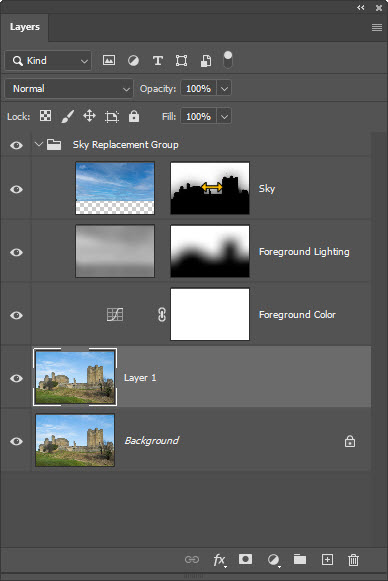
This means we can get even more detailed with our edits once the tool is closed, using Layer Masks and additional Adjustment Layers to fine-tune the blend.
Photoshop continues on its journey ease our editing burden by giving us tools that allow us to continue editing with all the power of Masks and Adjustment layers to make sure our composite looks believable and in less time than it used to take.
The new Sky Replacement Tool, give it a try you won’t be disappointed.
If you find there are areas that need some more work you can still the use the Refine Edge Brush to work on these areas. In this case we did not need to as the Refine Hair tool does more of the work for us.
If you found this tutorial useful please subscribe to my Youtube Channel
Also find us on Facebook and give my page a like
