Create Lightning Effect in Photoshop
In this video you will learn how to create a lightning bolt effect using a Gradient and a Filter.
Step 1 – Create a New Empty Layer
Lets start with this image of a spooky church and try and add even more atmosphere with some lightning.
We will do this by using the Difference Clouds Filter. You may need to experiment a little with it as its effect it is image size dependent. My start image size was 2000 px wide.
First thing is to add a new empty layer by clicking the new layer icon at the bottom of the Layers Panel or with the keyboard shortcut CTRL+SHIFT+N(Win) CMD+SHIFT+N(Mac).

Step 2 – Create a Gradient
Reset the Foreground/Background colours to Black and White by pressing the D and X keys.
![]()
Select the Gradient tool from the Toolbox or press the G key on the keyboard.

From the Tool options bar select a Linear Gradient and the Foreground to Background gradient.

Draw a gradient diagonally across the image from top left to bottom right.

Step 3 – The Difference Clouds Filter
Now we are going to use the Difference Clouds Filter to create the start of our lightning.

This is what it will look like after applying the filter.

The darker area is the start of our lightning. At the moment its black, we need it to be white so we need to invert it with the keyboard Shortcut CTRL+I(Win) CMD+I(Mac).
Now you will see the start of our lightning.

Now we need to increase the contrast. Select the Levels command.

Pull the Black slider over to the right until the effect looks good then click OK

Step 4 – Tidy up the Lightning
Using the D and X keys set the Foreground colour to Black. Choose the Brush tool by pressing the B key on the keyboard. Then paint out the areas that you don’t want.
Change the Blend Mode of the lightning layer to Screen to drop out all the black pixels.

Step 5 – Change the Shape and Direction of the Lightning
Choose Free Transform CTRL+T(Win) CMD+T(Mac) and set up the position of our main Lightning bolt.
Repeat the steps 1 – 5 and create some more lightning to add to the composition.

.Step 6 – Group the Lightning Together
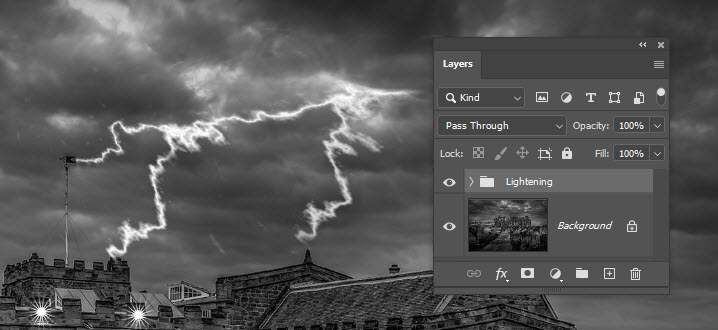
Select all the Lightning layers and press the G key to create a group to tidy up the layer stack. Rename the group lightning.
You will need to change the Blend Mode back to Screen.

And that’s how to create realistic Lighting in your image.
Image courtesy of Tim Hill on Pixabay.com
https://pixabay.com/photos/st-mary-s-church-whitby-yorkshire-3790659/
If you found this tutorial useful please subscribe to my Youtube Channel
Also find us on Facebook and give my page a like
